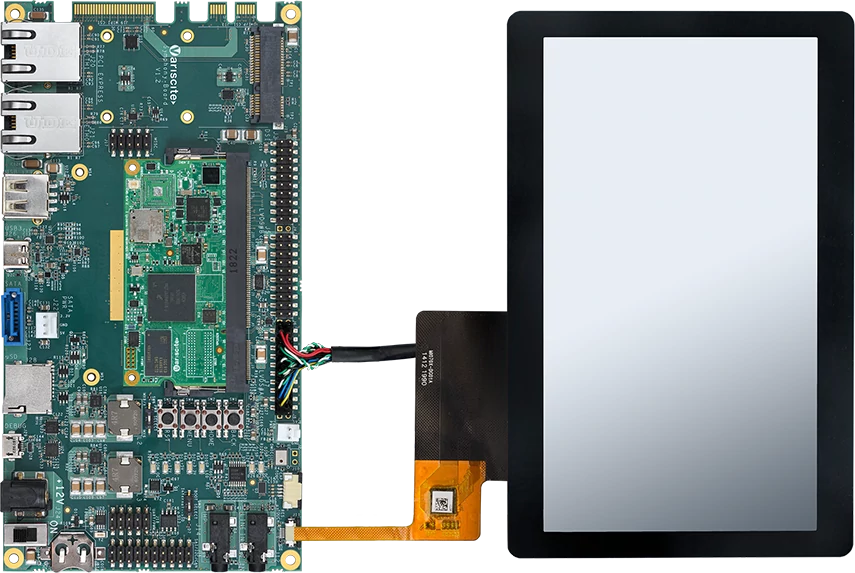
Board description
The VAR-SOM-MX8M-NANO is a cost-optimized System on Module based on NXP’s i.MX 8M Nano, 1.5GHz Quad-core Cortex-A53™ plus 650MHz Cortex-M7™. The SoM offers an ideal solution for cost-sensitive designs that require power-efficiency and high-performance graphics as well as for general-purpose applications.
This highly integrated platform’s connectivity options include certified single-band 802.11 b/g/n or dual-band 802.11 ac/a/b/g/n, BT4.2/BLE, GbE and USB2.0. Furthermore, the system supports full -40 to 85C industrial operating temperatures, Vivante GC7000UL GPU, LVDS and DSI.
The VAR-SOM-MX8M-NANO is a member of the ‘VAR-SOM Pin2pin’ product family, providing a maximum scalability range; from the entry-level i.MX6UL/6ULL platform, through the i.MX 6 platforms, I.MX 8M-MINI, i.MX 8X up to the i.MX 8QuadMax.
The VAR-SOM-MX8M-NANO Development Kit and Starter Kit can serve as a complete development platform for both evaluation and application development purposes. The kits provide a great showcase of the VAR-SOM-MX8M-NANO connectivity features and performance.
Test results
The Yocto Project releases in the table below have been tested by the Mender community. Please update it if you have tested this integration on other Yocto Project releases:
SD Card Root Filesystem
| Yocto Project | Build | Runtime |
|---|---|---|
| sumo (2.5) |  |
 |
| zeus (3.0) |  |
 |
eMMC Root Filesystem
| Yocto Project | Build | Runtime |
|---|---|---|
| sumo (2.5) |  |
 |
| zeus (3.0) |  |
 |
Build Means that the Yocto Project build using this Mender integration completes without errors and outputs images.
Runtime Means that Mender has been verified to work on the board. For U-Boot-based boards, the integration checklist has been verified.
Getting started
Prerequisites
- A supported Linux distribution and dependencies installed on your workstation/laptop as described in the Yocto Mega Manual
- NOTE. Instructions depend on which Yocto version you intend to use.
- Google repo tool installed and in your
PATH.
Configuring the build
Setup Yocto environment
Set the Yocto Project branch you are building for:
# set to your branch, make sure it is supported (see table above)
export BRANCH="sumo"
Create a directory for your mender-variscite setup to live in and clone the
meta information.
mkdir mender-variscite && cd mender-variscite
Initialize repo manifest:
if [ ${BRANCH} == "zeus" ]; then
  REPO_BRANCH="fsl-${BRANCH}"
else
  REPO_BRANCH="${BRANCH}"
fi
repo init -u https://github.com/varigit/variscite-bsp-platform.git -b ${REPO_BRANCH}
mkdir .repo/local_manifests
cd .repo/local_manifests/
wget https://raw.githubusercontent.com/mendersoftware/meta-mender-community/$BRANCH/scripts/mender-no-setup.xml
cd -
Fetch layers in manifest:
repo sync
cd .repo/local_manifests/
ln -sf ../../sources/meta-mender-community/scripts/mender-no-setup.xml .
cd -
Determine root filesystem media
The Variscite VAR-SOM-MX8M-NANO platform supports running U-Boot directly from the following media:
- SD-Card
- eMMC
The root filesystem can be stored on any of the following media:
- SD-Card
- eMMC
Set the shell variable for your desired root filesystem media:
export MEDIA="sdcard"
export MEDIA="emmc"
Setup build environment
Initialize the build environment:
MACHINE=imx8mn-var-som DISTRO=fsl-imx-xwayland . var-setup-release.sh -b build
cat ../sources/meta-mender-community/meta-mender-variscite/templates/bblayers.conf.append >> conf/bblayers.conf
cat ../sources/meta-mender-community/templates/local.conf.append >> conf/local.conf
cat ../sources/meta-mender-community/meta-mender-variscite/templates/local.conf.append >> conf/local.conf
cat ../sources/meta-mender-community/meta-mender-variscite/templates/local-${MEDIA}.conf.append >> conf/local.conf
Building the image
You can now proceed with building an image:
bitbake core-image-base
Replace core-image-base with your desired image target.
Using the build output
SD Card
Provision an SD Card with the built above. WARNING, make sure you use the correct device node as the of= parameter to avoid overwriting the wrong device:
sudo dd if=tmp/deploy/images/imx8mn-var-som/core-image-base-imx8mn-var-som.sdimg of=<SDCARD-DEVICE-NODE> conv=fdatasync bs=8M
Remove the SD Card from your build host and insert it into the target. Configure your board to boot from SD Card by moving the Boot Select switch (also labeled as SW3 ) to the SD position. Now turn on power to the board and it will boot from the SDCard and Mender will connect to the server configured in your local.conf file.
eMMC
Using either the above built SDCard Yocto image or the Variscite Yocto Recovery SD card, boot your system off of SD. Transfer the following file from your build PC to the target board with a USB drive:
- tmp/deploy/images/imx8mn-var-som/core-image-base-imx8mn-var-som.sdimg
Assuming the USB drive is mounted on the target at /mnt, run the following commands:
sudo dd if=/mnt/core-image-base-imx8mn-var-som.sdimg of=/dev/mmcblk0 conv=fdatasync bs=8M
halt
Then change the Boot Select switch (also labeled as SW3 ) to the Internal position and power cycle your board.
On the other hand, if you already have Mender running on your device and want to deploy a rootfs update using this build, you should use the Mender Artifact files, which have .mender suffix. You can either deploy this Artifact in managed mode with the Mender server (upload it under Releases in the server UI) or by using the Mender client only in Standalone deployments.
References
- The Variscite imx8m-var-dart template files can be found in meta-mender-community.
- The official Mender documentation explains how Mender works. This is simply a board-specific complement to the official documentation.
If this post was useful to you, please press like, or leave a thank you note to the contributor who put valuable time into this and made it available to you. It will be much appreciated!
