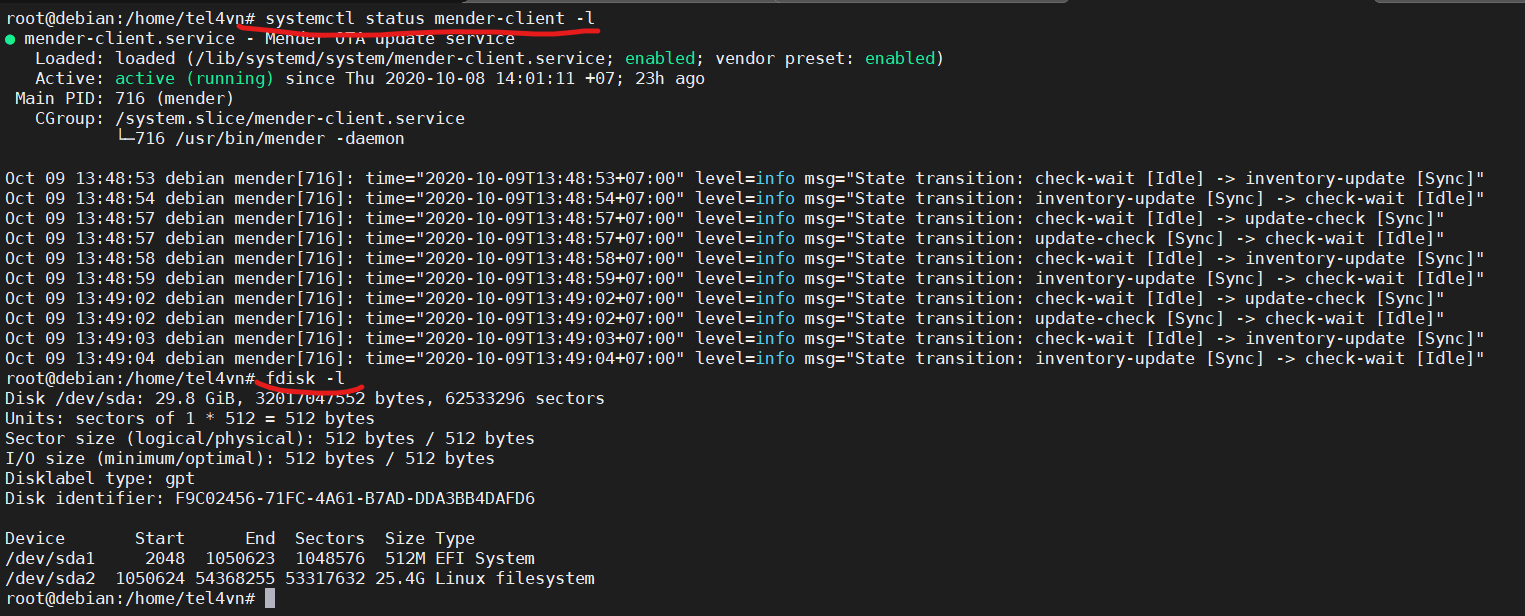
If you flash mender-convert image you should see 2 root partitions. Inthis casemender client should be already installed and you don’t need to perform any action. So back to the rootfs. On your running system can you pls try to give output of: fdisk -l /dev/sdX - where os is installed
then pls try to get output of systemctl status mender-client
My virtualhost is the one with nginx and I created image and converted on this machine.
My mini pc is the one connected with mender, and I want to deploy nginx on it with mender
@M.Tuan I think the problem is that you are mixing the golden image/device (source) with the in-field device (destination), as @MarekBelisko mentions too.
The golden image device can have just one root file system partition, like yours. You just use it to make modifications, extract the root system partition and convert it into a Mender Artifact for deployment. You never deploy to this device (it’s the source).
The in-field devices (destination) on the other hand, must have a dual root file system (A/B) set up. Otherwise the Mender client can not install a Mender Artifact to them.
You might have all the pieces you need already. You just need one more (destination) device to test with. You can try this:
Flash a .sdimg file you have converted already (likely in your deploy or output directory under mender-convert directory) to your destination device
Deploy the update to that device, not the source device (with one root file system)
The sdimg file is created by mender-convert and is in the same location as the mender file. Just write that to your disk and then you should be good to go.
Drew
But isn’t mender-convert is just a docker container for converting? I install mender-convert on a virtual machine just for converting? Do I have to install mender-convert on my target machine?
mender-convert does more than just create a new disk image file with your golden image rootfs copied into both A/B partitions. It also downloads the mender-client deb file and copies the files from it into the new A/B and data partitions amongst other things.
The mender-convert utility runs on your development machine. It takes as input your golden master image and produces the following:
sdimg/uefiimg file: This is the multiple partition image that you write directly to the storage media.
mender artifact: This is the single partition image that is used to deploy to device OTA. This assumes the devices are running the sdimg/uefiimg version.
Both output files contain the mender client and all configuration needed for Mender functionality.
After I use mender-convert, there is only 4 files, there is no .sdimg file, but I only need the debian9_nginx_01-x86_64-mender.ext4 to flash the target machine and I’m good to go right?
But I’m using Debian, in Debian it doesn’t have live system like Ubuntu (like this INTEL NUC x86-64 Ubuntu 18.04), can I copy debian9_nginx_01-x86_64-mender.ext4 to a USB Flash Drive, plug it in the target machine and flash it from there?
And after I’ve flashed the targer machine, I’ll have a Device connect to hosted.mender.io right?
And I can now use 1 of the 2 .mender file to create a deployment from mender right?
You don’t need the mender-artifact process. If you need to influence the mender-convert process then you can create extra config files that enhance or override default configs. So you should only have one “.mender” file and one “.sdimg” or “.img” file. The file extension of the full disk image is derived from the extension of your golden image file (although not all extensions are supported last time i tested).
By default the “mender_convert_config” file has compression set to gzip so that’s why you are getting a “.img.gz” file out for the full disk image
The golden image can be created in a VM and then use the vmtools to export the vmdisk image to a raw disk image, so you don’t necessarily need a separate machine to create the golden image. If you are feeling adventurous you can use mkosi to build a golden image as part of a build process rather than using a manual process to create it. However the latter is a lot more involved and not something i would advise whilst learning the mender-convert process as how you create the golden image can be a decision you can change later down the line.
One option is to image ubuntu to the flash drive and copy your debian image onto the usb drives file system. Then boot from the ubuntu on the usb disk and image from there. Another option is to use the same ubuntu flash drive boot from it and then dd the disk image file remotely from your dev machine to the physical disk of the NUC using ssh (there are tutorials on the internet for this). Another option is to configure your mender-convert configs to use PARTUUIDS for the disk partition references and then image your debian full disk image to the usb stick and boot from that directly. There are other discussions in the forum on that topic. I’m sure there are more options, as imaging a disk image to another device is not a mender-specific thing.
If your configuration is correct, with correct keys etc installed in the disk image, then the device should appear as a pending device on your mender-server.
You could create a deployment with the .mender file, however if nothing has changed so between it and the full disk image, it will probably be ignored by the mender-client. To do a test deployment with that .mender file you will probably need to use mender-artifact to change the “artifact-name” to simulate the next version of your image (you will need to double check this, as its been a very long time since i did this).
And I do wanna ask if after the image is converted, can I make a USB installer by file.ext4 or file.img.gz? So I can just plug this USB in any machine and it will install automatically?
I’m guessing the error is because you are not copying the entire image. You are only copying 7500 MB (ie block size of 1M and a count of 7500).
Also why are you compressing the file and then immediately uncompressing it? That will take a lot of time but not do anything. Try the following to create the image:
Oh, I see, thank you very much.
I compressed it because I create the golden image on 1 host, and then scp it to a more powerful machine to uncompress and convert it.
Again, thank you, that really help me a lot.